Upgrade Agent
The Upgrade Agent tool converts an Einstein Bot into an Agentforce Service Agent. It reads your bot's dialogs, action steps, and intents, and generates the equivalent agent subagents and actions from them. Your original bot stays active during the move, so you can cut over at your own pace.
Want to run it now? Open Upgrade Agent → allows you to select an org, bot and bot version and then starts conversion.
How the Upgrade Agent works
Subagents from dialogs. The tool looks at your bot's dialogs and groups the ones with intents and utterances. Similar dialogs get grouped together, and each group becomes a subagent with a generated classification description, scope, and subagent instructions. Custom conditional logic in a dialog carries into that subagent's instructions.Learn more about subagents.
Actions from action steps. For every dialog it converts, the tool turns the dialog's action steps into agent actions, each with a generated description and input/output parameters. Learn more about actions.
For example, a bot with Service Request, Get Service Status, Reschedule Service, Customer Details, and Vehicle Details dialogs — each backed by a flow-based action step — converts into a single Service Appointment Management subagent with Manage Service Appointment, Get Service Request, and Get Car Models actions.
Upgrade Einstein bots to Agentforce Service Agents
The upgrade tool works directly in labs.agentforce.com/upgrade-agent or through your Claude Code.
Run the tool from Labs directly, or from local Claude Code.
From the Labs UI
Connect to an org, then pick the bot to convert.
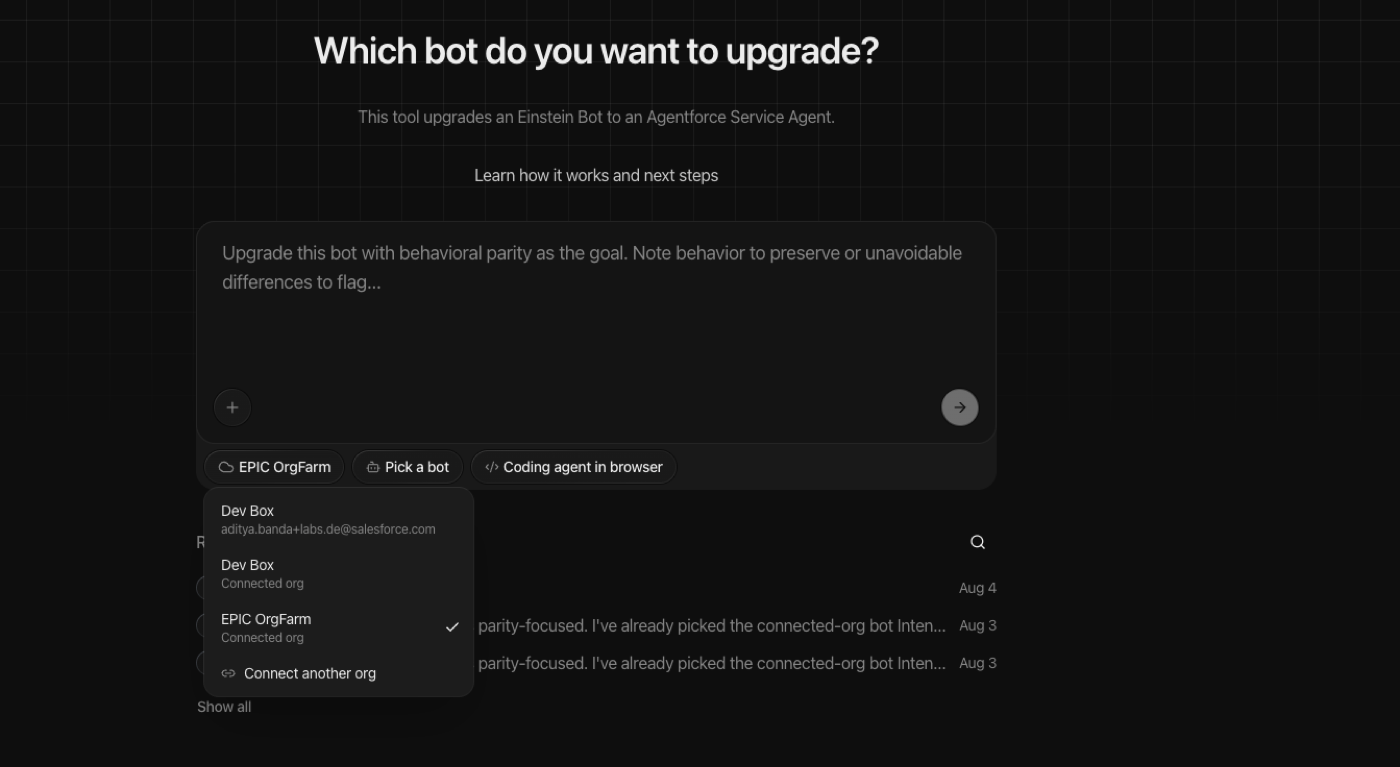
Click Connect another org.
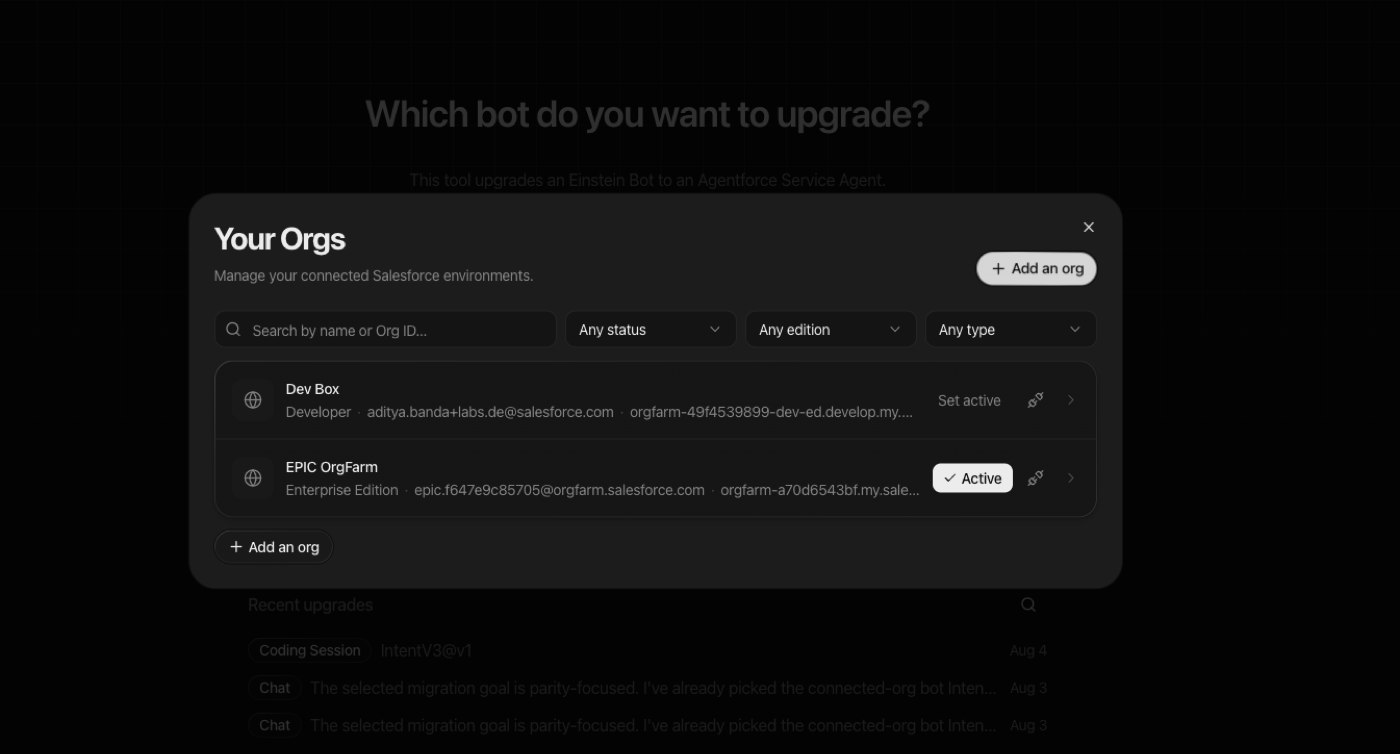
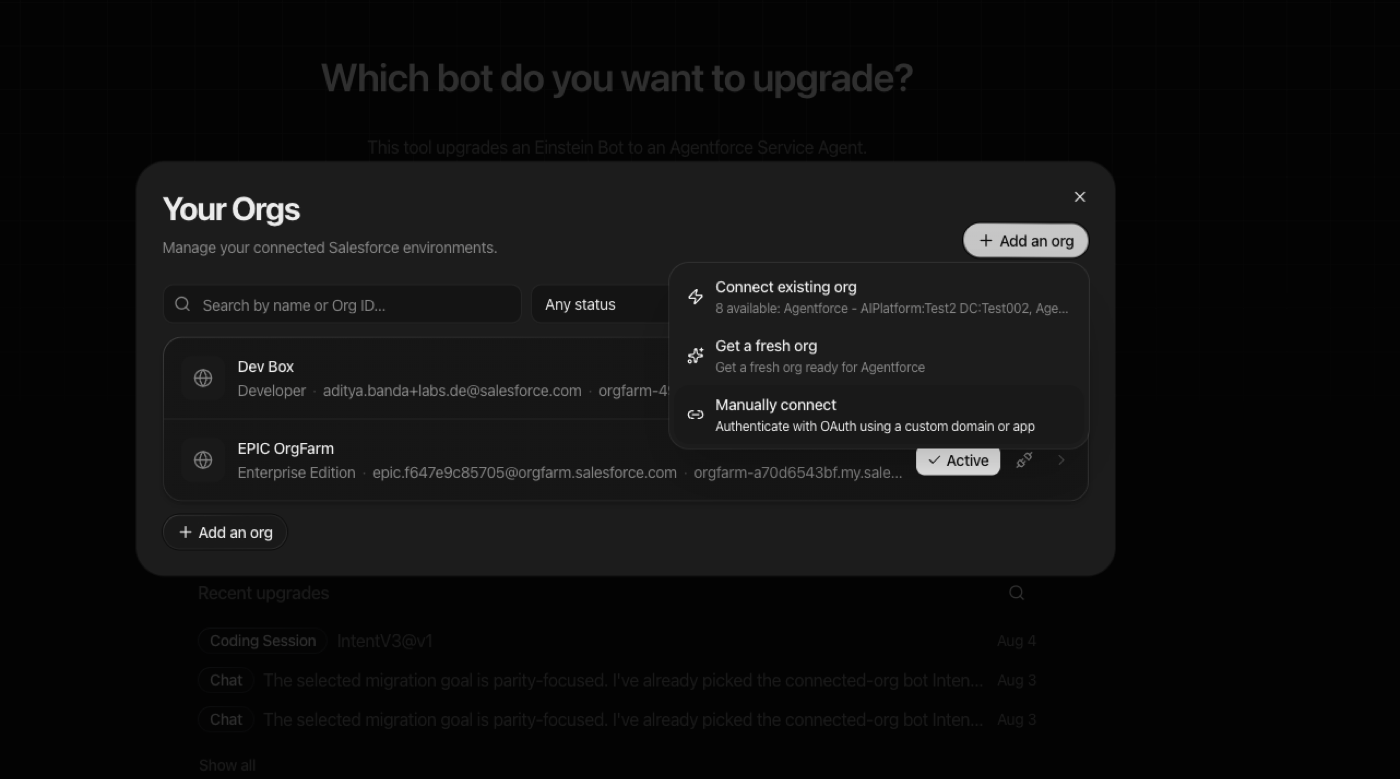
In Your Orgs, click Add an org.
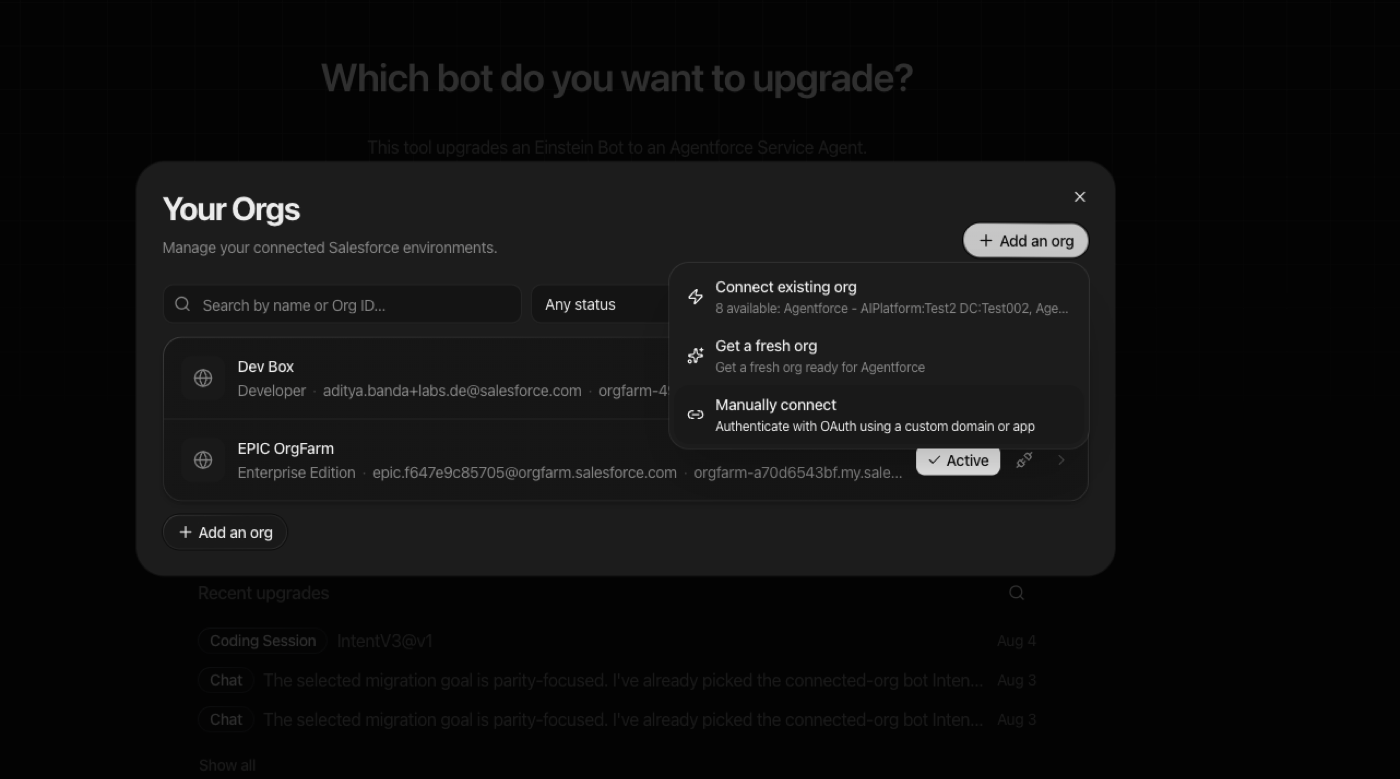
Click Manually connect.
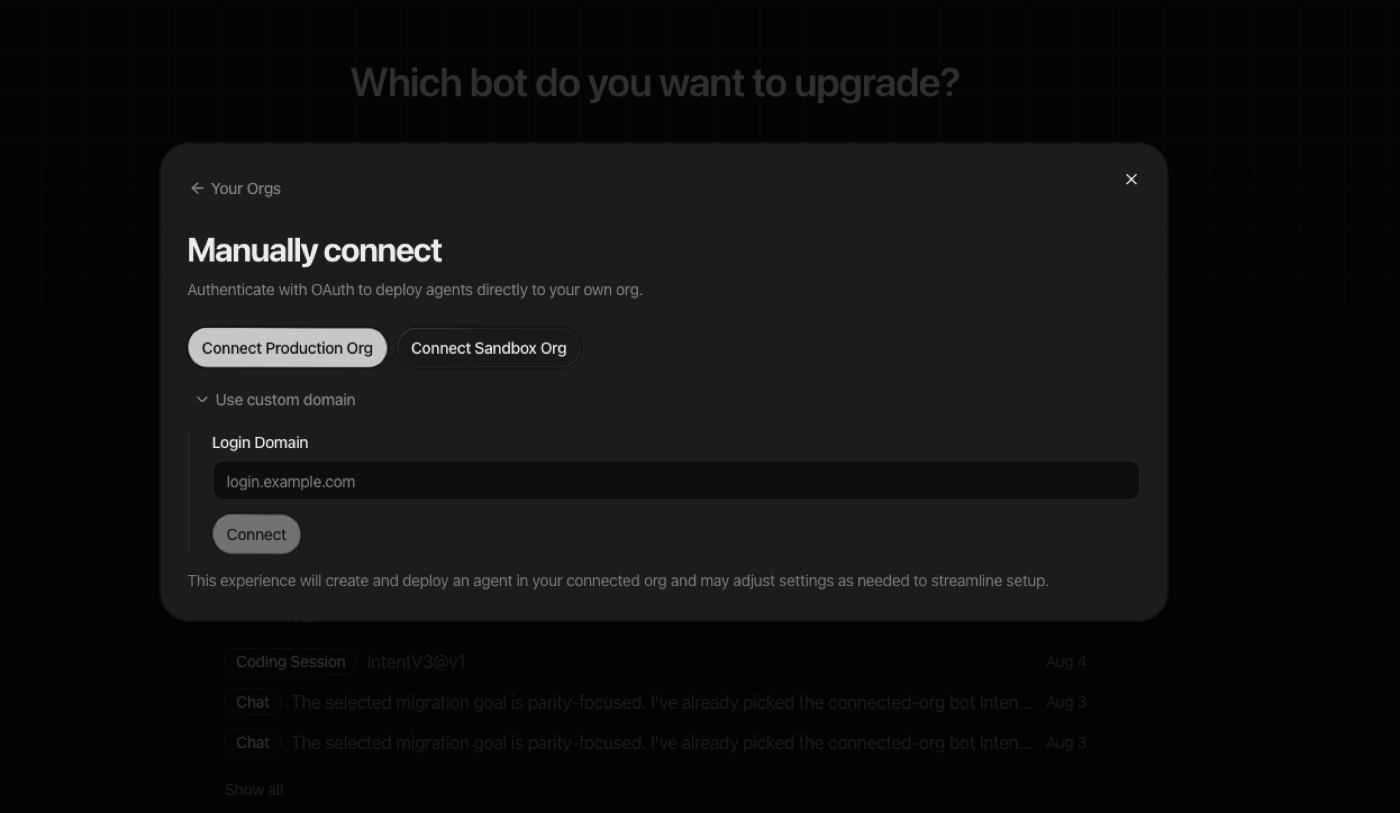
Choose Connect Production Org or Connect Sandbox Org — expand Use custom domain and enter a login domain — then click Connect.
To connect an internal orgfarm sandbox org, click Add an org → Connect existing org instead — this lists every orgfarm org you own. Not all orgfarm sandbox orgs can be connected to the tool; this is a known limitation.
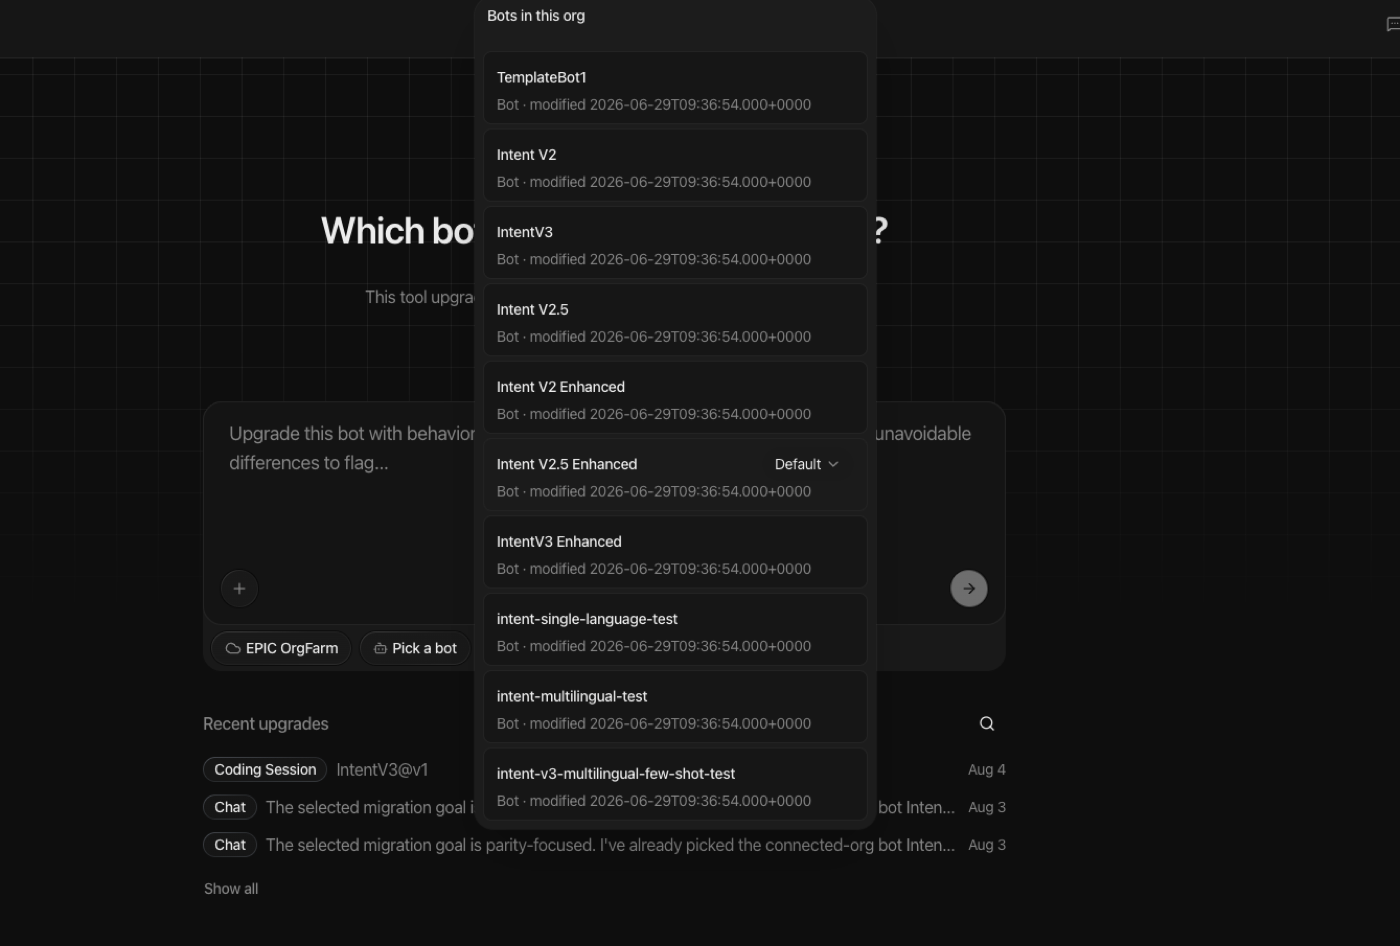
Once the org is connected, click Pick a bot. This lists every bot and bot version in that org.
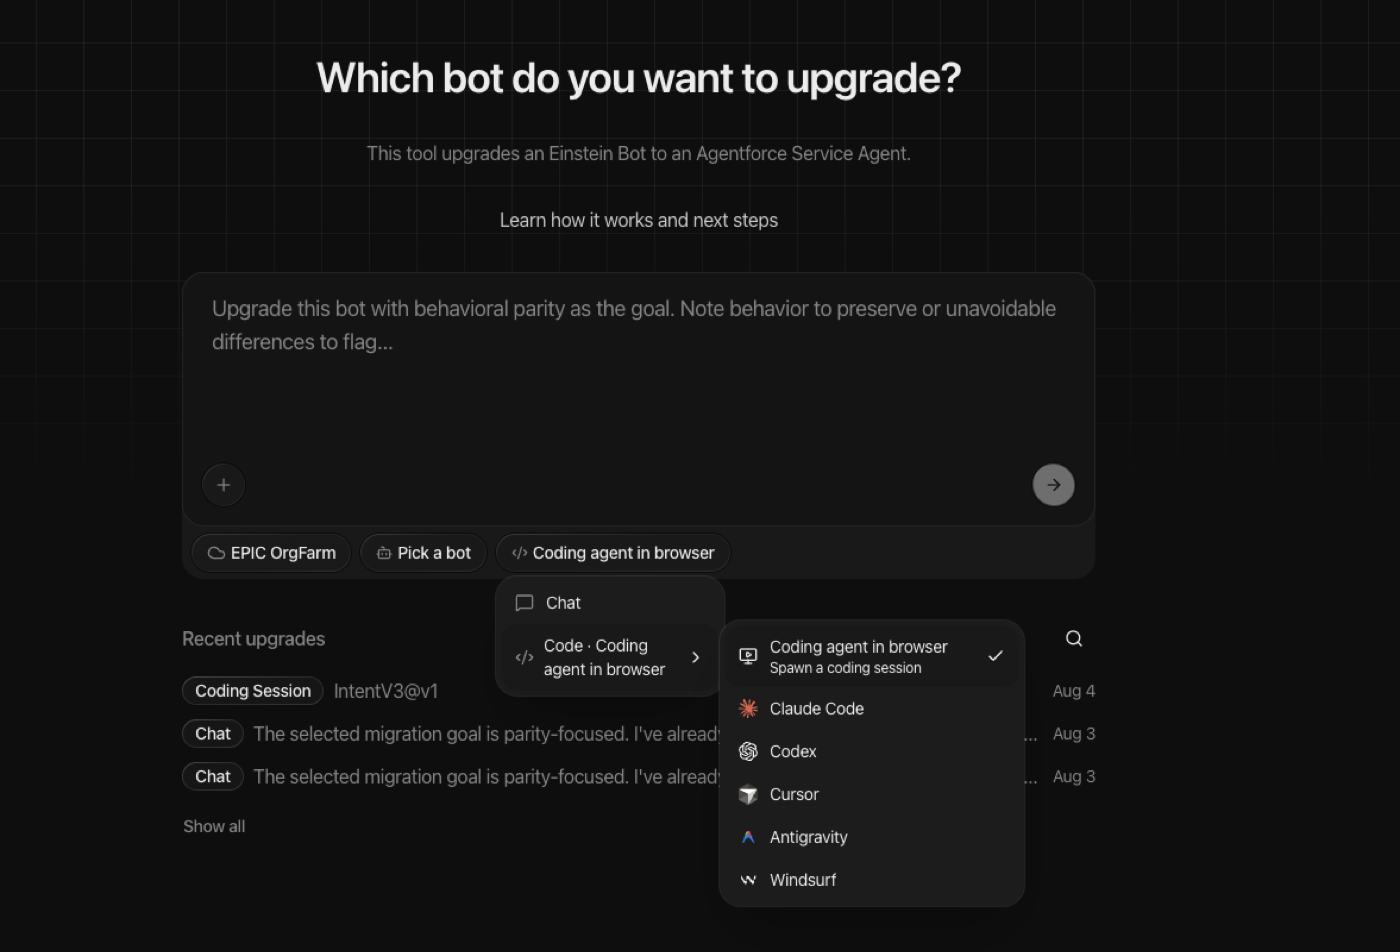
Click Coding agent in browser then select Coding agent in browser.
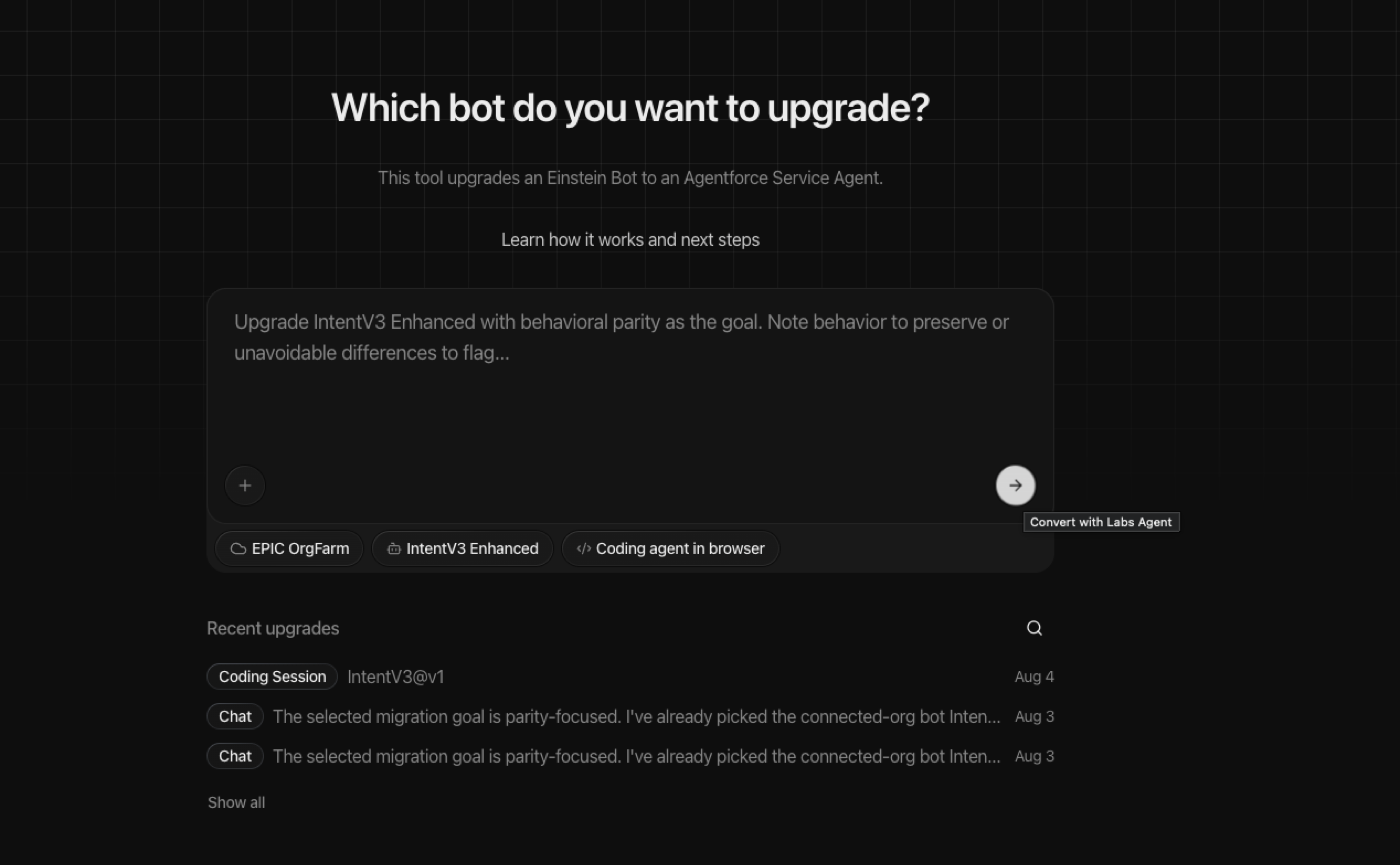
Click the arrow button to start conversion.
Press Enter to accept the default prompt in the coding session that opens.
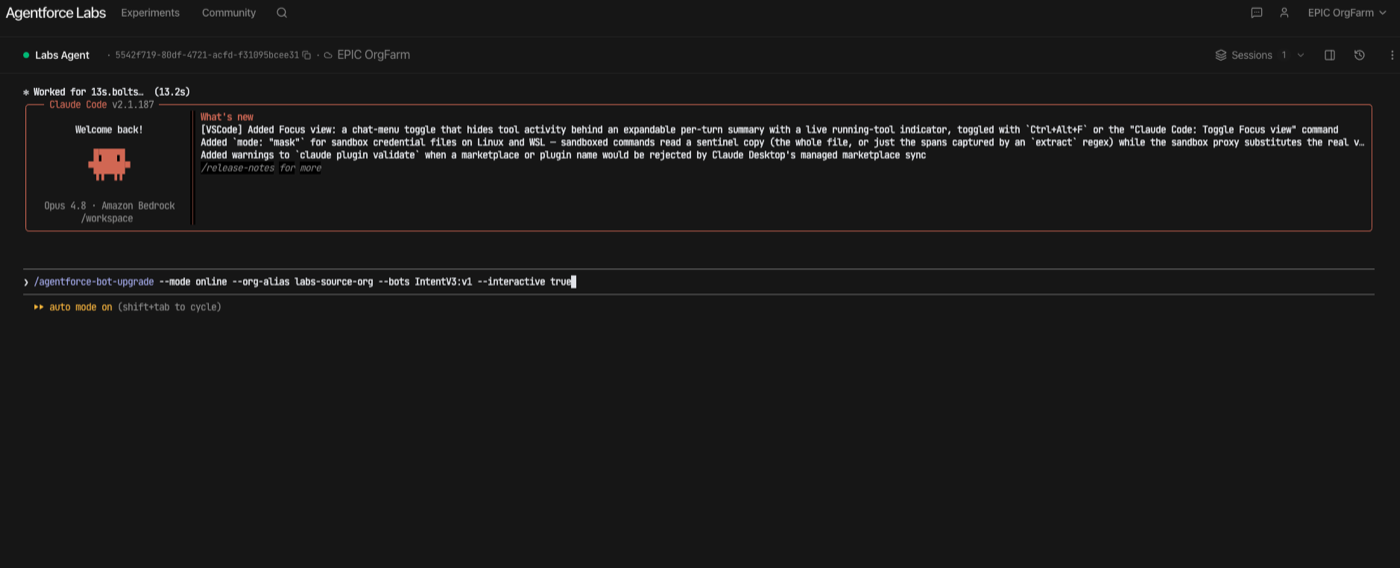
Alternatively, click + icon and select the bot package zip as input. However, org should be selected before you begin conversion as the converted agent file is deployed in the org directly. 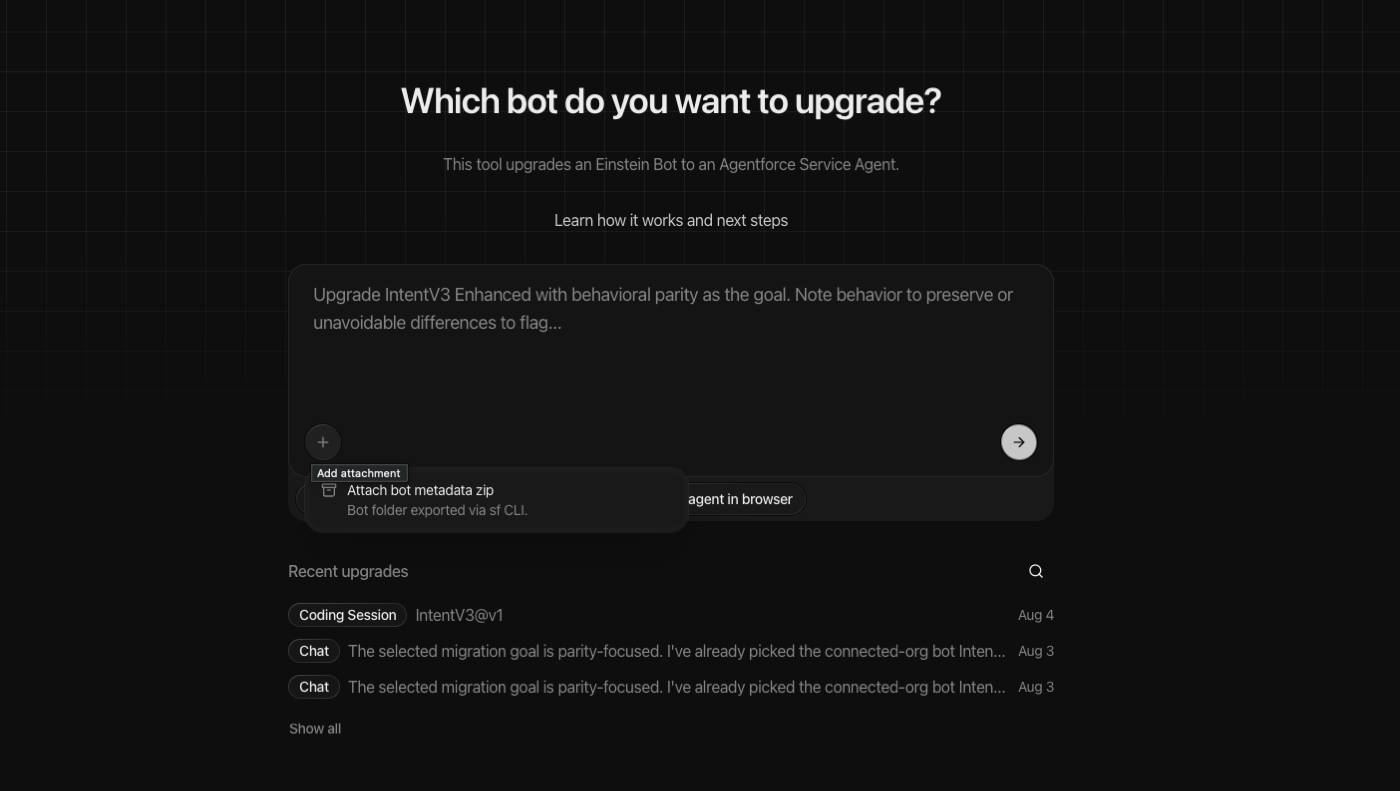
From Claude Code
Run the conversion through the agentforce-bot-upgrade skill if you're already working in Claude Code, or want the upgrade scriptable and running on your own machine.
Prerequisites
- sf-cli installed, version 2.0.0 or later
- Claude Code installed and set up
Check or install sf-cli:
sf --version
If it's missing or outdated, install or update it from the Salesforce CLI setup guide.
Install the skill:
If you have any ADLC skills or plugins (
agentforce-generate,agentforce-test,agentforce-observe) installed in~/.claude, delete them first — the bot-upgrade skill installs its own versions.Create and
cdinto a new, empty folder. This is the root the skill runs from and where converted bots land.Install the skills package:
1npx skills add forcedotcom/sf-skills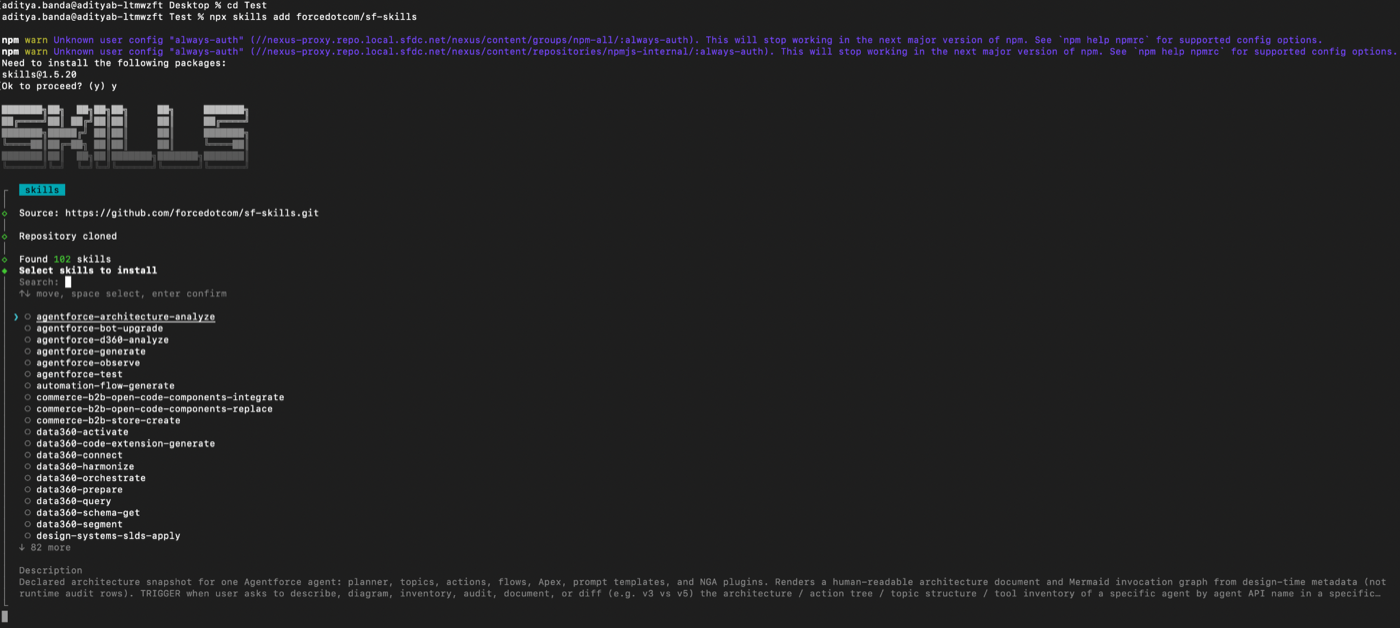
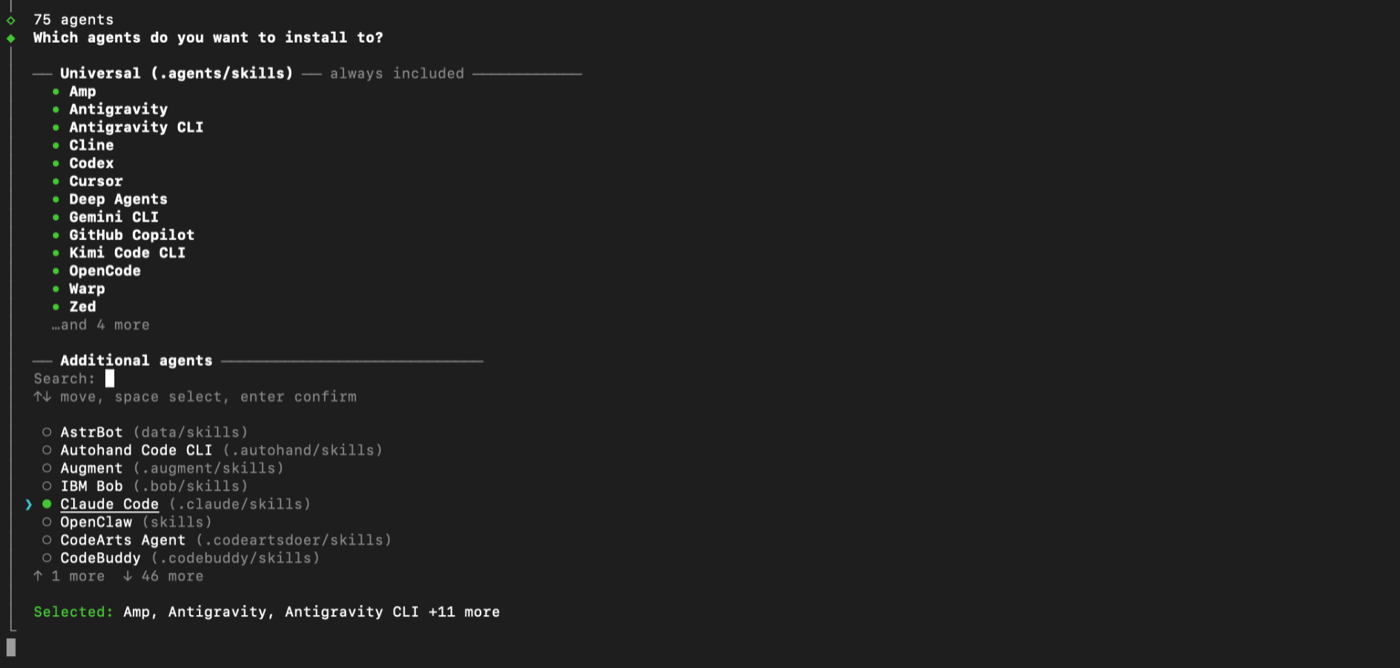
Select
agentforce-bot-upgrade,agentforce-generate,agentforce-observe, andagentforce-test, then confirm.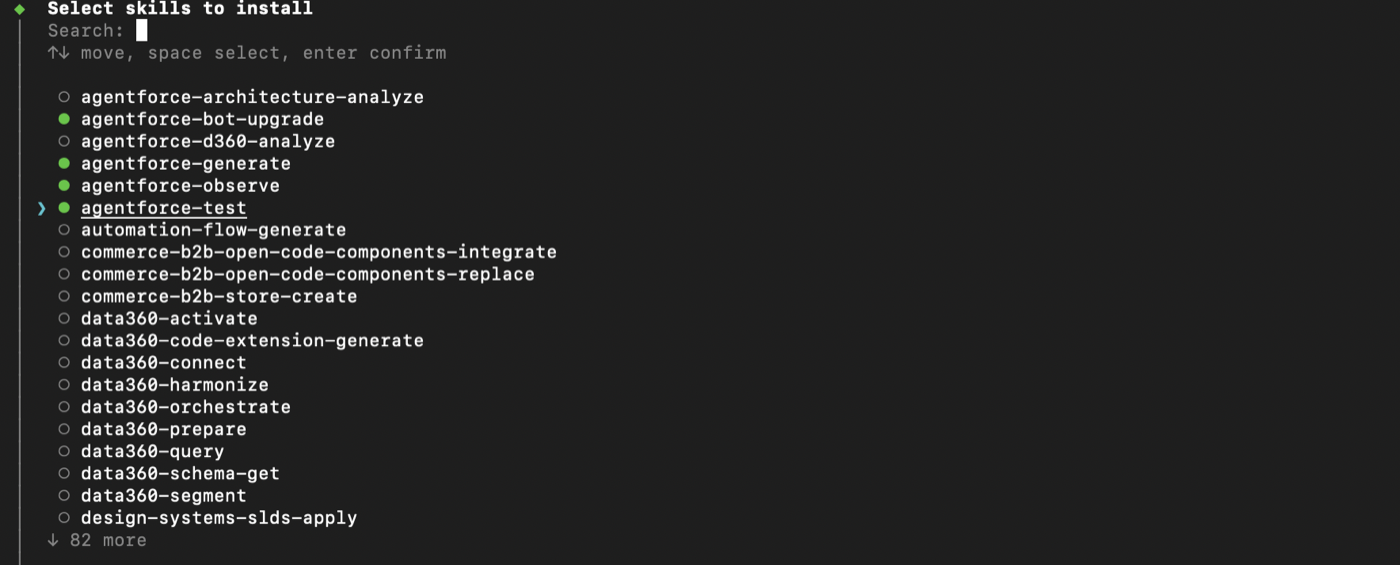
Select Claude Code as the agent to install to.
Select Project as the installation scope — this keeps skills scoped to the current folder and available during the conversion.
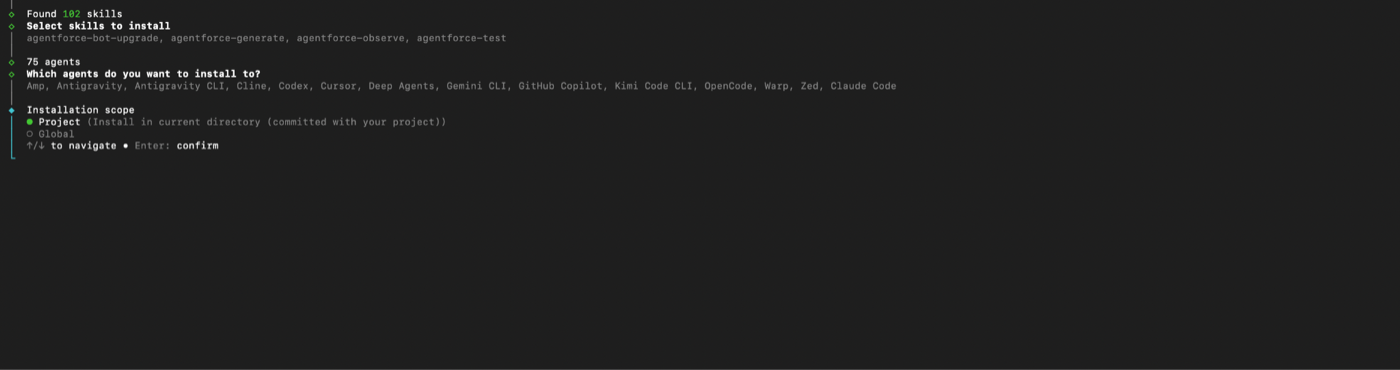
Choosing Global scope can leave the skill's symlinks missing, so the skill won't be available in a Claude Code session.
Run
claudein the terminal and invoke the skill. It supports both interactive and non-interactive modes.
Create Org Alias
If you haven't aliased the org yet, then create an alias as mentioned below.
sf org login web --instance-url <org_url> --alias <org-alias>
Invoke the skill:
/agentforce-bot-upgrade --mode online --org-alias <alias> --bots bot1:v1,bot2:v2,bot3:v3 --interactive true/false
Considerations
These bot elements aren’t moved or converted by the Upgrade Agent.
- Goals
- Knowledge feedback
- Action steps with no output, or that exist only for dialog navigation
- Action steps that create feedback logs
- Logic that routes to a specific queue on escalation
- Welcome messages with menu options (routing from menu options isn't supported; use prechat config instead)
- Option buttons where the option count exceeds 11
- File attachments (inbound or outbound)
These bot elements aren’t moved by the Create Agent from Bot tool, but you can add similar functionality to your agent after creating it.
- The bot user isn’t moved. After creating an agent, you can assign a user to it from the agent Details page.
- The bot’s connected channels and Omni-Flows aren’t moved. See Connect Your AI Agent to Customer Channels.
- System dialogs, such as the Welcome dialog, aren’t moved. You can add a static welcome and transfer message from the agent Details page.
- Dialogs that use data from your knowledge base, including those related to Article Answers and Generative Knowledge Answers, aren’t moved. To use knowledge articles with your agent, see Manage Data Sources.
- Dialogs that transfer the conversation aren’t moved. To transfer conversations, add the Escalation subagent to your agent.
- Rich content and messaging components aren’t moved. To format agent responses based on messaging components, set up adaptive response formats.
- Action steps that use an Apex class or flow are moved, but other action steps, such as those that use object search, aren’t moved. After creating the agent, you can add custom actions. See Create a Custom Agent Action.
- The bot’s primary language is moved to your agent, but additional languages aren’t. Currently, you can create AI agents from a bot with English as a primary language only. To add additional languages to your agent, see [Use Additional Languages in Enhanced Chat Conversations}(https://help.salesforce.com/s/articleView?id=ai.service_agent_languages.htm&type=5).
General Considerations
- The Upgrade Agent tool uses generative AI to create agent subagents and actions based on your bot’s dialogs, intents, and other information.
- For the best results, make sure that your bot follows best practices before you create an agent from it. See Use Intents to Understand Your Customers and Guidelines for the Cross-Lingual Intent Model.
- Before activating the agent, carefully review and test it. See Best Practices for Topic Instructions and Test Your Agent.
- If your bot involves context variable, deploy the agent in messaging embedding channel and test primary use cases
- Agentforce Service Agent is a consumption-based product that bills based on usage type.
Next steps
- Preview the converted agent in preview mode in Agent Builder.
- Context variables don't work in preview mode.
- Deploy the agent to a messaging embedded channel to test with context variables.
- The Upgrade Agent tool doesn't generate or evaluate test cases against the converted agent. Test it end-to-end in the Agentforce Testing Center before you activate it.
- Connect Your AI Agent to Channels
- Transfer Conversations from an Enhanced Bot to an Agentforce Service Agent